What is the Combine feature?
|
The combine feature allows you to:
a) Combine one part with another part to make one part. b) Subtract the shape of one part from another part. c) Keep the intersecting material. |

|
How to locate the Combine feature
|
The easiest way to find the combine feature is to use search commands. On the top right corner of Solidworks there is a search bar. The default search option is for the Solidworks help. On the right hand side of the search bar there is a drop down menu. Click on the drop down menu and select commands (See Images). Once you select commands use the search bar to search combine. This menu can also be used to search for all other commands (sketch, extrude, fillet, convert entities etc.).
|
|
What do I need for the Combine feature to work?
|
- 2 part files (main body and subtraction/addition part)
- Go to the arrow in the top left corner (see images). - Got to INSERT, then go down to PART (see images). - Select which the second part you want to insert with your main part. - Before clicking OK ensure both SOLID and SURFACE bodies boxes are checked (see images). - Go to the SEARCH command bar in the top right. Search 'move' and select MOVE/COPY BODIES (see images). - Select the part you which to move (see images). - Use the mate option to position the second part to where you want it. Ensure you select ADD after every movement of the part. - When the part is in the correct position, go to the search bar in the top right. - Search and Select COMBINE. |
|
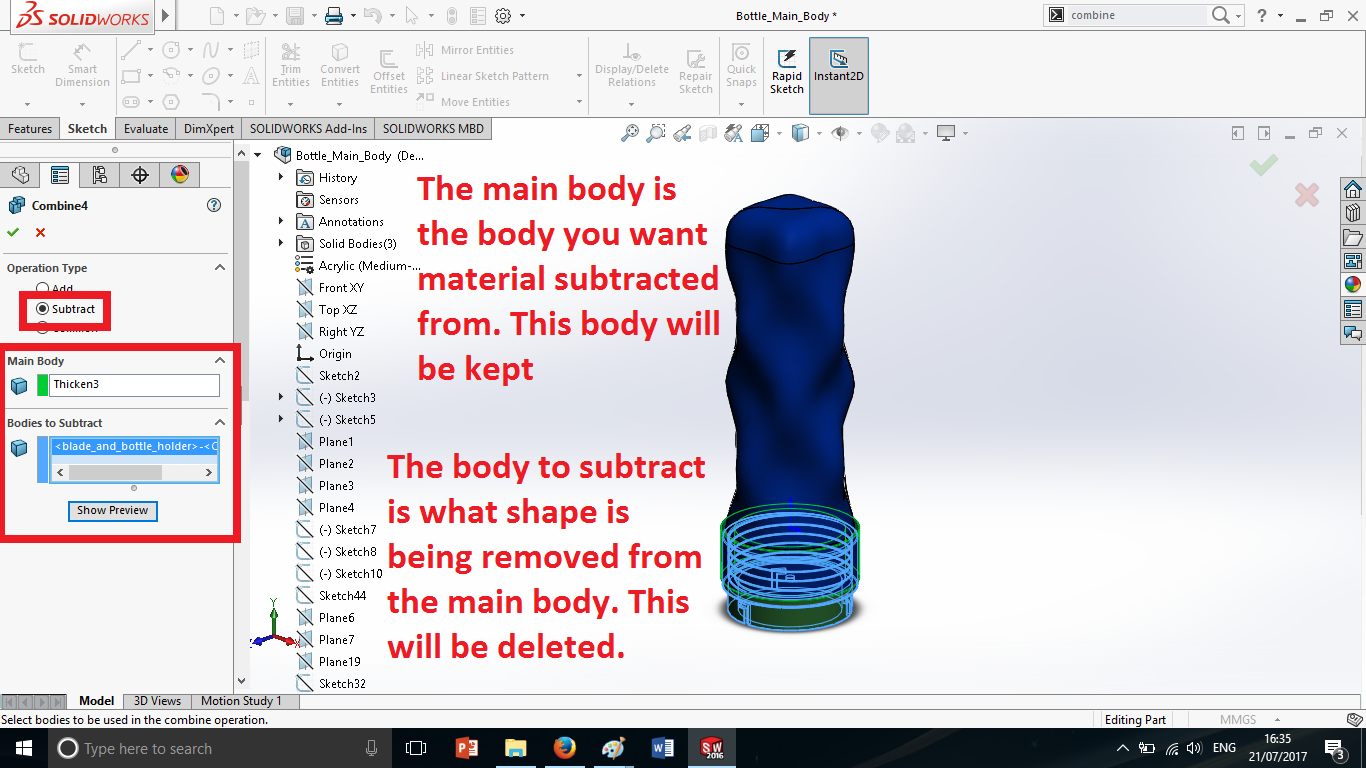
How to use the Subtract
|
On the left side menu, there are 3 options for the combine feature. For this, select subtract.
This will allow you to remove the shape of one part from another part. You will be asked for the main body which is the part to be kept and have material removed from. The other part must be selected for the other section. This part will be deleted/removed after the feature. |
|
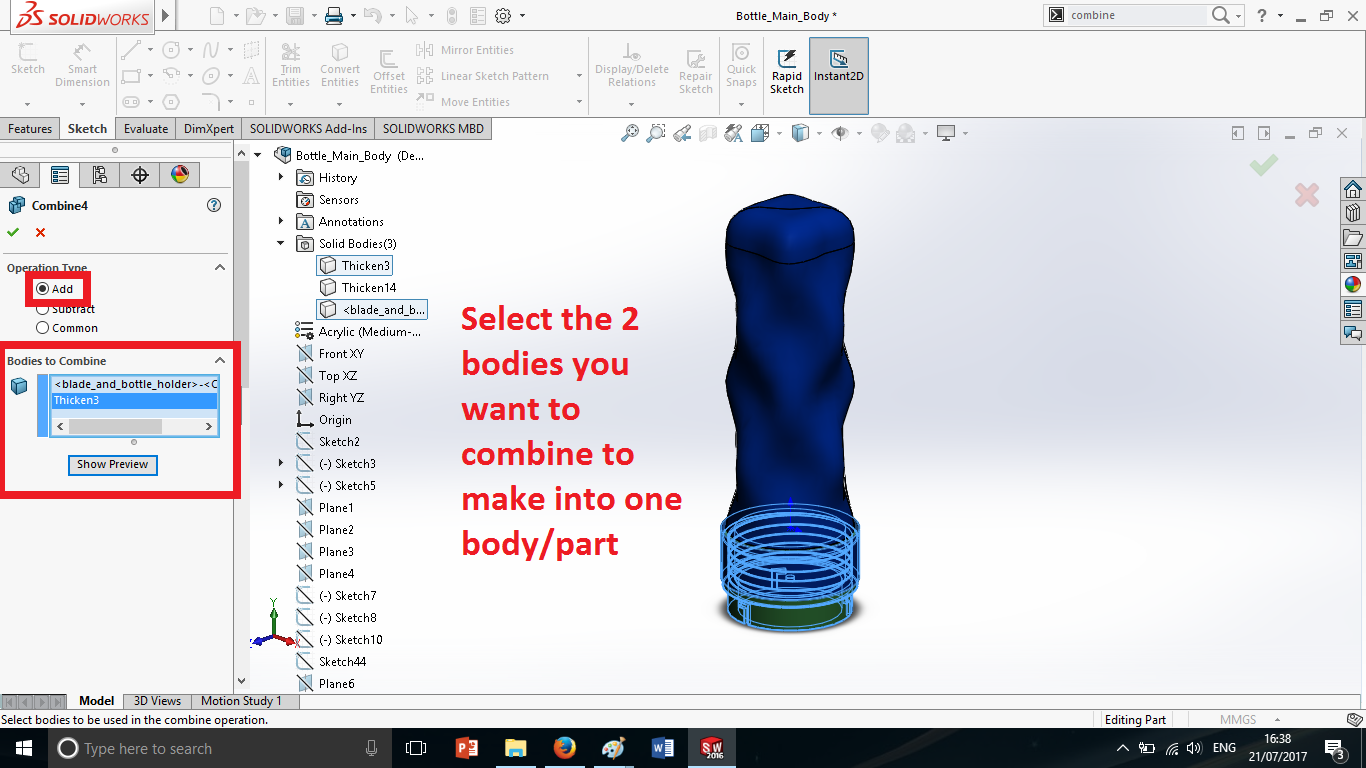
How to use the Addition and Common
|
On the left side menu, there are options for add and common/combine. Both features are used the same way.
You need only select either add or common and select the two parts. Add will join 2 parts together into one part. Common will remove all material in both parts except for the intersecting material. |
|
